














Now Reading: How to Fix Your Squat Form (Common Mistakes That Kill Your Knees)
-
01
How to Fix Your Squat Form (Common Mistakes That Kill Your Knees)



The squat is one of the most valuable exercises you can do for lower-body strength, hip stability, and everyday function.
It trains your quads, glutes, and hamstrings in a way that carries over directly to real life — climbing stairs, standing up from a chair, or lifting something off the floor.
But there’s a catch: a squat performed with poor mechanics doesn’t just limit your results, it can quietly overload your knees, hips, and lower back over time.
If you’ve ever felt a nagging ache in your knees after leg day, chances are your squat form — not the exercise itself — is the culprit.
This guide breaks down exactly how to fix your squat form, the most common mistakes that damage your knees, and simple corrective drills to help you move better under load.
Table of contents
Why Squat Form Matters More Than You Think
A squat is a full chain movement.
Your ankles, knees, hips, and spine all have to work together in sync. The moment one joint falls out of position, another has to compensate for it.
For example:
- If your heels lift off the ground, your weight shifts forward and your knees absorb extra load.
- If your chest collapses forward, your lower back takes on stress it wasn’t designed to handle.
- If your knees cave inward, rotational stress builds up inside the knee joint itself.
None of these compensations feel dangerous in the moment — which is exactly why they’re so easy to ignore until pain shows up.
Getting your mechanics right before adding weight means your muscles do the work, not your joints.
How to Do a Proper Squat: Step-by-Step
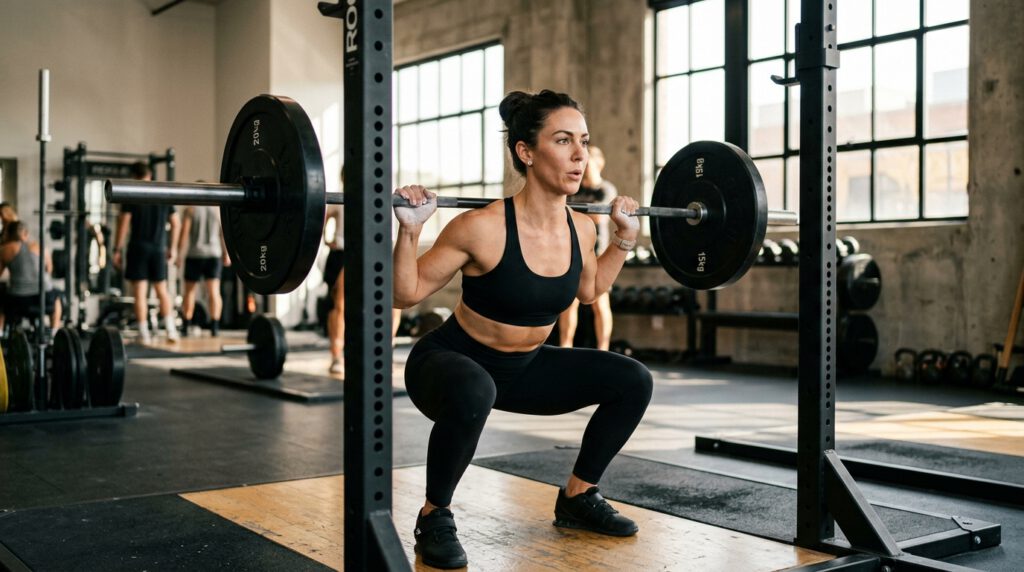
Before troubleshooting mistakes, it helps to lock in what a clean squat actually looks like.
- Set your stance. Feet roughly shoulder-width apart, toes turned out slightly (anywhere from straight ahead to about 30 degrees, depending on your hips).
- Brace your core. Take a breath in and tighten your trunk as if you’re about to absorb a punch. Hold that brace through the entire rep.
- Sit back first. Push your hips back and down at the same time, like you’re lowering into a chair behind you — don’t just bend your knees and drop straight down.
- Track your knees outward. As you descend, actively press your knees out so they follow the line of your second and third toes.
- Go as deep as your mobility allows. Ideally your thighs reach parallel to the floor, but depth should never come at the cost of your heels lifting or your back rounding.
- Keep your chest tall. Some forward lean is completely normal, especially if you have long legs or a longer torso — but it shouldn’t be excessive.
- Drive up through your whole foot, not just your toes, keeping the knee position and core brace intact all the way to the top.
- Exhale once you’re fully upright, then reset your brace for the next rep.
Practice this pattern with bodyweight only — three sets of 8–10 slow, controlled reps — before loading it with any external weight.
 |
| Proper squat form step by step showing correct knee and hip alignment |
Common Squat Mistakes That Are Killing Your Knees
1. Knees Caving Inward (Knee Valgus)
This is by far the most common squat error.
Instead of tracking over your toes, your knees drift inward toward the midline as you descend.
This usually happens when the muscles on the inside of your thighs overpower the muscles on the outside of your hips (your abductors), and it places unwanted rotational stress directly on the knee joint.
The fix: Cue yourself to “push your knees out” on every rep.
If it keeps happening under load, loop a resistance band just above your knees during warm-up sets — it gives you a physical cue to press against and helps wake up your glutes and hip abductors before you squat heavy.
.png) |
| Example of knee valgus, a common squat mistake that damages the knees |
2. Knees Traveling Too Far Forward, Heels Rising
If your weight shifts onto your toes and your heels start lifting off the floor, your knees are absorbing load they shouldn’t be.
This is often a sign of limited ankle mobility rather than a strength issue.
The fix: Push your hips back first, before your knees bend forward. Add ankle mobility work into your warm-up — kneeling ankle stretches, where you drive your knee forward over your toes while keeping your heel pinned down, are a simple way to build the range you need over time.
3. Heels Lifting Off the Ground
Closely related to the mistake above, rising onto your toes shifts your center of gravity forward and increases knee stress.
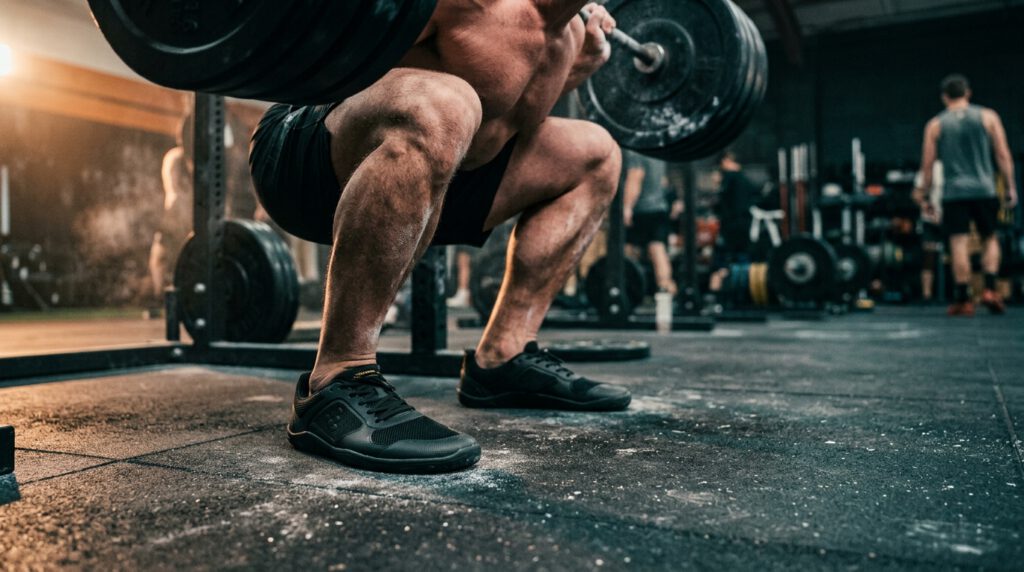
Keep your entire foot — heel, midfoot, and toes — pressed into the floor throughout the movement. Flat-soled shoes or lifting shoes help here, since thick, cushioned running shoes tend to tip your weight forward.
4. Rounding Your Lower Back
A loose, unbraced core is usually the cause.
When your abs aren’t engaged, your lower back rounds under load to compensate.
The fix: Brace your core hard before you even start lowering, and keep your chest lifted throughout the rep. If you’re unsure whether your back is staying neutral, hold a broomstick against your spine (touching your head, upper back, and tailbone) as you squat — if it loses contact at any point, that’s your cue to adjust.
5. Hyperextending Your Lower Back at the Top
Some lifters arch their lower back sharply at the top of the rep to manufacture extra “depth” or to make up for weak glutes.
This loads the lumbar spine in an unsupported position.
The fix: Finish each rep with a deliberate glute squeeze rather than an exaggerated back arch, and aim to keep your spine neutral from the first inch of the movement to the last.
6. Rushing the Descent
Dropping too fast reduces the time your muscles spend actually working and dumps more stress onto the joints and connective tissue at the bottom of the range.
The fix: Count to two or three on the way down.
A slower, controlled descent keeps your muscles doing the job instead of your joints.
7. Squatting Beyond Your Available Mobility
There’s no universal “correct” squat depth — it depends on your hip structure, ankle mobility, and femur length.
Forcing extra depth beyond what your body allows usually shows up as a collapsing chest, rising heels, or a rounding lower back.
The fix: Work within the range where you can maintain good form, and expand it gradually through mobility work rather than by forcing depth on every set.
8. Adding Weight Before Your Technique Is Solid
Loading a squat amplifies whatever pattern you’re already using — good or bad. If your bodyweight squat isn’t consistent yet, adding a barbell will only make the mistakes more pronounced.
The fix: Technique first, load second.
Only progress the weight once you can perform the movement cleanly for multiple sets in a row.
The “Knees Over Toes” Myth
You’ve probably heard the old rule: “never let your knees go past your toes.” In reality, this cue doesn’t work for everyone.
Your ideal knee position depends on your individual leg length, foot size, and torso proportions — someone with long legs and small feet will naturally have their knees travel past their toes in a proper squat.
Research published in the Journal of Strength and Conditioning Research found that artificially restricting the knees from moving forward reduced stress at the knee joint by 22%, but increased stress at the hip joint by over 1,000%.
In other words, blocking your knees doesn’t eliminate stress — it just relocates it to your hips and lower back. For most lifters, letting the knees track naturally over the toes (while staying aligned with the direction of the toes) is safer than forcing them back.
Why Your Knees Might Still Hurt During Squats
If your form looks solid but your knees still ache, the root cause is often one of these:
- Poor hip loading. If you’re not hinging your hips back enough, extra stress shifts to the knees. Practicing a slow, single-leg “touch-down” pattern — pushing your hips back while slowly lowering the opposite heel toward the floor — helps retrain proper loading before you go back to standard squats.
- Weak glutes. Your hips need to externally rotate under load so your knees can track correctly. Simple warm-up moves like clamshells and lateral band walks strengthen the outer hip muscles responsible for that rotation.
- Limited deep knee flexion. Everyday life rarely asks your knees to bend fully, so the tendons around the joint can be underprepared for a deep squat. Accessory exercises that emphasize a slow, controlled deep bend — like a deficit split squat — can build tolerance in that range over time.
- Limited ankle mobility. Since your knees need to travel forward over your toes during a squat, tight ankles (especially a stiff Achilles tendon) force compensations elsewhere. A few minutes of kneeling ankle stretches before you train can make a noticeable difference.
Don’t Forget Your Neck Position
It’s a small detail, but it matters: avoid looking up or extending your neck excessively during a squat. Keep a neutral neck position with your eyes focused about six to eight feet in front of you, as if a straight line ran from ear to ear through your head — don’t let your head or neck lead the movement.
Final Takeaway
Fixing your squat form isn’t about chasing perfect depth or copying someone else’s technique — it’s about controlling the variables that protect your knees: hip hinge, knee tracking, foot position, core bracing, and a spine that stays neutral throughout.
Master these fundamentals with your bodyweight first, then add load gradually.
If knee pain persists even after correcting your form, it’s worth having a physical therapist or qualified coach assess your movement in person — some issues go beyond what self-coaching can fix.
Ready to put this into practice?
Film your next squat session from the side and front, compare it against the checklist above, and adjust one cue at a time.
Small, consistent corrections beat a complete form overhaul every time.
 |
| Resistance band drill to fix knee valgus during squats |
 |
| Kneeling ankle mobility stretch to improve squat depth and knee tracking |
 |
| Correct neutral spine vs rounded back during a squat comparison |
Related Posts
Stay Informed With the Latest & Most Important News
Previous Post
Next Post









Advertisement