










Now Reading: Foam Roller Benefits: How to Use It for Recovery (With Full Routine)
-
01
Foam Roller Benefits: How to Use It for Recovery (With Full Routine)


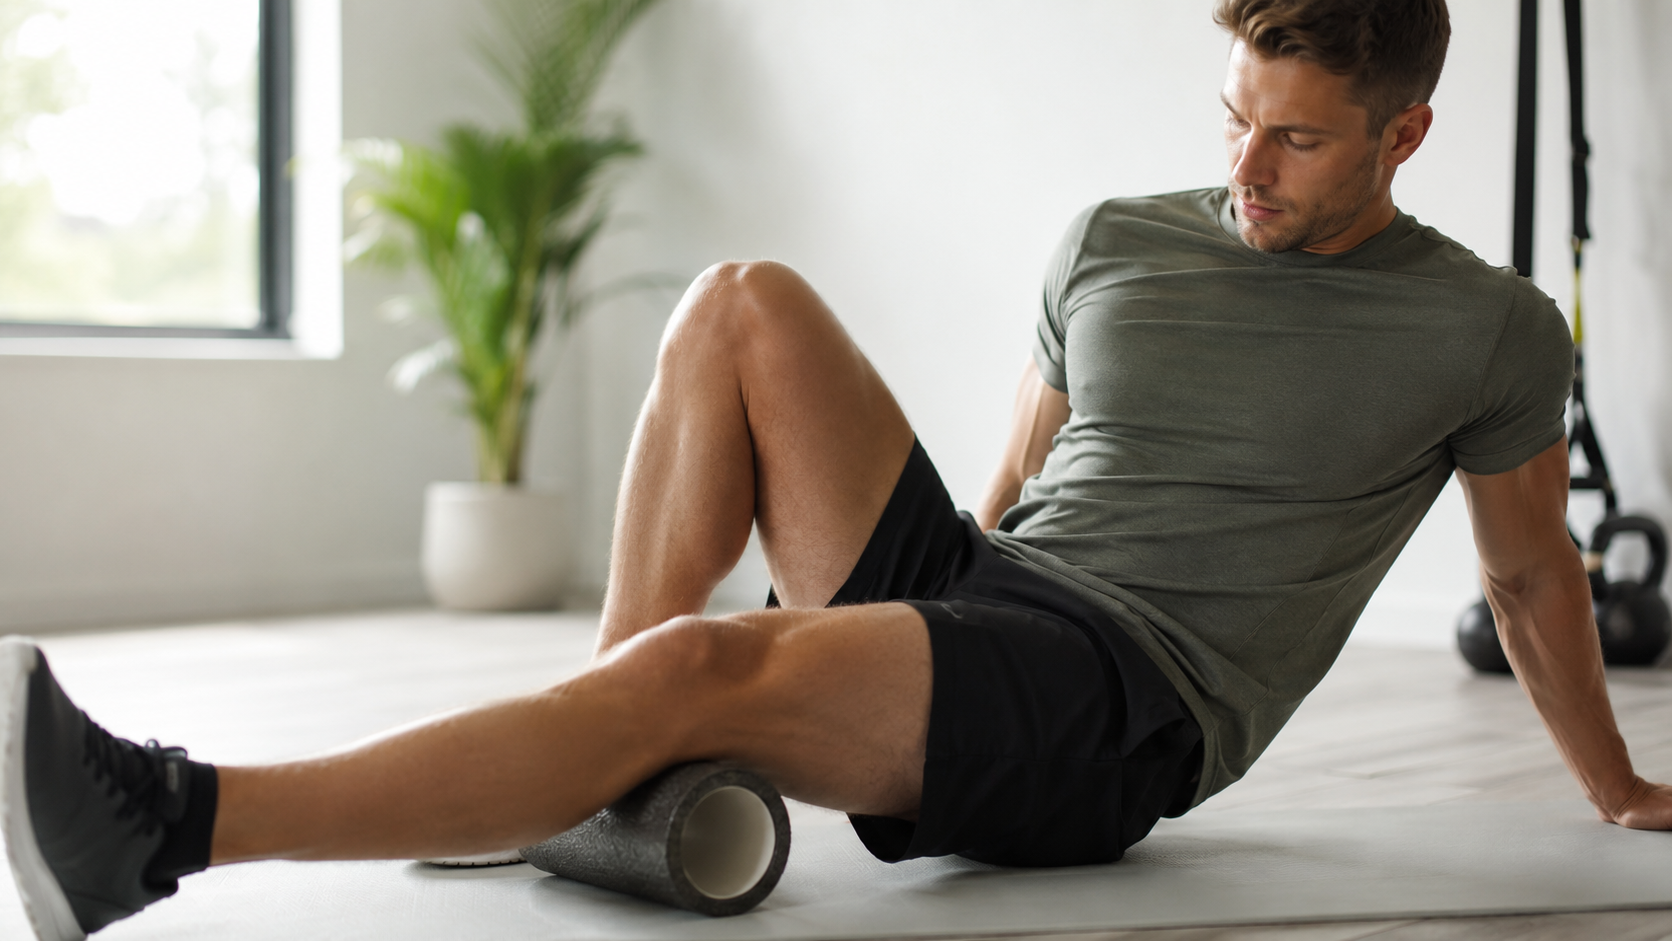
If your legs feel like concrete the day after a workout, or your lower back is stiff from another day at a desk, a foam roller might be the cheapest, most effective recovery tool you’re not using yet.
It takes up little space, costs less than a single physical therapy session, and can be used at home in under 10 minutes a day.
In this guide, you’ll learn exactly what foam rolling does to your muscles, how it fits into a complete recovery plan, and a full-body routine you can start tonight — plus our picks for the best foam rollers you can buy right now.
Table of contents
What Is Foam Rolling?
Foam rolling is a form of self-myofascial release (SMR) — a type of self-massage that uses a cylindrical foam tool to apply pressure to muscles and the fascia, the connective tissue that surrounds them.
Instead of relying on a massage therapist’s hands, you use your own body weight to roll pressure along a muscle group, targeting knots, tight spots, and areas of tension.
It’s simple, low-cost, and something almost anyone can do at home, in a gym, or even at the office.
Foam Roller Benefits: What the Research Says
Foam rolling isn’t just a trend — a growing body of research backs up what athletes and physical therapists have been saying for years.
Regular use may help with:
- Increased blood flow to muscle tissue and fascia, which supports faster recovery
- Reduced muscle soreness, including a measurable drop in delayed onset muscle soreness (DOMS) in the 24–72 hours after exercise
- Improved flexibility and joint range of motion, without the temporary strength loss sometimes associated with static stretching
- Faster warm-ups, priming muscles for exercise
- Stress relief, since the slow, deliberate breathing involved in foam rolling can have a calming, almost mindfulness-like effect on the nervous system
- Better body awareness, helping you notice tight or overworked areas before they turn into an injury
A 2015 systematic review published in the International Journal of Sports Physical Therapy found that self-myofascial release can improve range of motion without negatively affecting muscle performance — a key advantage over traditional stretching alone.
Foam rolling tends to work particularly well on the quads, hamstrings, calves, glutes, IT band, lower and upper back, lats, shoulders, and neck.
Who Should Use a Foam Roller?
Foam rolling is especially useful if you:
- Sit at a desk most of the day and deal with tight hips, a stiff upper back, or rounded shoulders
- Train regularly and want to speed up recovery between sessions
- Struggle with proper form during exercises because of limited mobility
- Deal with recurring tightness in the calves, IT band, or lower back
- Want an active way to de-stress at the end of the day
If you have an active injury such as a bruise, strain, muscle tear, or fracture, avoid rolling that area and check with a physical therapist or doctor first. It’s also best to steer clear of rolling directly over joints, bones, or the lower spine.
How to Foam Roll: The Basics
Before jumping into the routine, a few ground rules make foam rolling far more effective — and far less painful.
- Start with a low- to medium-density roller if you’re new to this. You can move to a firmer, textured roller as your tissue adapts.
- Move slowly. Rolling too fast reduces the effectiveness. Aim to cover about one inch per second.
- Pause on tender spots. When you find a tight or sore area, hold there for 20–30 seconds instead of rolling straight through it.
- Breathe. Inhale, then exhale slowly as you roll into a tight spot — this helps the muscle relax rather than tense up against the pressure.
- Treat your body in sections rather than rolling continuously back and forth over a large area.
- Expect some discomfort, not pain. Tenderness is normal, especially at first. Sharp or shooting pain is a sign to stop.
- Never roll your lower back directly — the lumbar spine isn’t well protected by muscle the way your upper back is, so use light stretching or a massage ball for that area instead.
The Full-Body Foam Rolling Recovery Routine
Do this routine 3–4 times per week, either as a warmup before training or as a cooldown afterward. Spend 30–60 seconds on each muscle group, and use slower, shorter strokes over any spot that feels particularly tight.
1. Quads
Lie face down in a forearm-plank position with the roller under the front of your thighs. Roll from just above your knees to just below your hips, pausing on tender points. For more precise pressure, focus on one leg at a time.
2. Hip Flexors
Still in a forearm-plank position, shift the roller to one hip flexor with the opposite leg bent out to the side. Roll slowly up and down and side to side for 30 seconds, then switch sides. This is especially valuable if you sit for long stretches during the day, since prolonged sitting can noticeably limit hip mobility.
3. IT Band
Lie on your side with the roller under the outer thigh, bracing yourself with your forearm and opposite leg. Roll between the knee and hip for 30 seconds per side. Go slowly here — the IT band is a common source of knee pain in runners, and it responds better to patience than pressure.
4. Hamstrings
Sit with legs extended and the roller under your thighs, hands behind you for support. Lift your hips slightly and roll from just above the knee to just below the glutes.
5. Calves
Sit with the roller under your lower legs, stacking one leg on top of the other for extra pressure. Roll from below the knee to above the ankle, rotating your leg side to side to reach the inner and outer calf muscles.
6. Glutes
Sit on the roller, cross one ankle over the opposite knee, and shift your weight toward that hip. Roll over the fleshy part of the glute, then switch sides.
7. Upper Back (Thoracic Spine)
Lie on your back with the roller under your mid-back, knees bent, arms crossed over your chest. Lift your hips slightly into a shallow bridge and roll from your shoulder blades down to the base of your ribcage — never into the lower back.
8. Lats
Lie at a 45-degree angle with the roller under one lat (the muscle just below your armpit). Roll from the armpit down toward the mid-back, then switch sides.
9. Shoulders
Lie on your side with the roller under one shoulder, guiding your movement with your opposite arm. Roll slowly over the deltoid, rotating your torso slightly to catch the upper back as well.
10. Neck
Lie on your back with the roller positioned where your neck meets your skull. Slowly turn your head side to side, pausing on any tight spots. Use very light pressure here — the neck needs a gentle touch.
Total time: About 10–15 minutes for the full routine.
How Foam Rolling Fits Into a Complete Recovery Plan
Foam rolling is powerful, but it works best as one piece of a bigger recovery strategy — not a stand-alone fix.
Three elements work together to help your body actually adapt and get stronger between workouts:
- Self-myofascial release (foam rolling): Reduces tension, improves circulation, and helps you spot problem areas before they become injuries.
- Mobility training: While flexibility is about how far a muscle can lengthen, mobility is about how well a joint moves through its full range with control. Dynamic stretches, yoga, and corrective drills like hip openers or thoracic extensions help maintain functional movement, especially if you sit most of the day.
- Sleep: This is where the deepest repair happens. During deep sleep, the body releases growth hormone that supports tissue repair and adaptation to training stress. Aim for 7–9 hours a night, with a consistent bedtime and minimal screen time beforehand.
Nutrition, hydration, and light active recovery (like walking or swimming) round out the picture, but foam rolling, mobility work, and sleep are the foundation. Get those three right and everything else becomes easier to sustain.
FAQ
What are the negatives of foam rolling?
Foam rolling is generally safe, but it can cause short-term discomfort, especially in very tight areas. Avoid rolling directly over an active injury like a bruise, strain, or fracture.
Why are my legs so sore after foam rolling?
Soreness usually means the muscle was very tight to begin with, or you applied too much pressure too quickly. Ease off the intensity and build up gradually.
Is it OK to foam roll every day?
For most people, yes. If you have an injury or a musculoskeletal condition, check with a physical therapist or doctor first for guidance on frequency and intensity.
What density foam roller should a beginner use?
Start with a low- to medium-density roller. Firmer, textured rollers are better suited to people who’ve built up some tolerance to the pressure.
Best Foam Rollers to Buy in 2026
Here are five well-reviewed options that cover different needs, from total beginners to people who want a deep-tissue, textured, or vibrating roller.
Best for Beginners: Amazon Basics High-Density Foam Roller
A smooth, no-frills, solid-core roller that’s ideal if you’ve never foam rolled before. It’s firm enough to be effective without being overwhelming, and it holds its shape well over time.
👉 Check price on Amazon
Best Overall / Most Popular: TriggerPoint GRID Foam Roller (13″)
A favorite among physical therapists and trainers. Its multi-density surface over a hollow, rigid core is designed to mimic the feel of a massage therapist’s hands, with distinct zones for broader pressure and more targeted trigger-point work.
👉 Check price on Amazon
Best Textured/Deep-Tissue Option: 321 STRONG Foam Roller
A medium-density roller with a patented three-zone texture designed to dig deeper into soft tissue than a smooth roller — a popular pick for people dealing with persistent knots or lower back tightness.
👉 Check price on Amazon
Best Vibrating Foam Roller: Zyllion ZMA-22
For anyone who wants to add vibration therapy to their recovery routine, this rechargeable roller offers four vibration speeds on top of its textured, multi-density surface — useful for more intense post-workout recovery sessions.
👉 Check price on Amazon
Best Add-On for Trigger Points: Kieba Massage Lacrosse Balls (Set of 2)
Perfect for areas a foam roller can’t reach as precisely, like the glutes, feet, and areas around the shoulder blades. A great companion tool alongside any of the rollers above.
👉 Check price on Amazon
The Bottom Line
Foam rolling is a simple, affordable form of self-massage that can ease muscle tension, speed up recovery, and improve your range of motion — but it works best as part of a bigger picture that includes mobility training and quality sleep.
Start with the routine above three to four times a week, choose a roller that matches your experience level, and give your body the recovery time it needs to actually get stronger.
Sources:
Cheatham, S. W., Kolber, M. J., Cain, M., & Lee, M. (2015). The effects of self-myofascial release using a foam roll or roller massager on joint range of motion, muscle recovery, and performance: A systematic review. International Journal of Sports Physical Therapy, 10(6), 827–838.
Van Cauter, E., Leproult, R., & Plat, L. (2000). Age-related changes in slow wave sleep and REM sleep and relationship with growth hormone and cortisol levels in healthy men. JAMA, 284(7), 861–868.
Stay Informed With the Latest & Most Important News
Previous Post
Next Post








Advertisement